Tuesday, December 20, 2016
The article below explains what you must do to become a video game animator in today's industry.
http://www.animationarena.com/getting-into-video-game-industry.html
To become a video game animator you shouldn't try to start your own game development team, but rather look to join one. To be a good video game animator you must have skills in modern computers and art. It is a good idea to get as much practice as possible. For 3D animation it is best to learn the basics of modeling versus trying to learn how to use different programs. Animation is not only done on computers, but also motion capture. As technology advances, motion capture is becoming more heavily used in gaming development. There are many different universities and schools that can provide an animation education.
How To Create A Table In Maya
 |
| First go to the polygons tab and click the cube. |
 |
| Next use the scale tool to adjust the size of the cube to make it look more rectangular and like a table top. |
 |
| Once you have created the table top, you now should reset steps 1 and 2 but this time make it look like legs. |
 |
Finally, adjust the location of the legs using the move tool to the corners of the table top. Make sure the legs are not sticking up inside of the table top.  You're finished! |
Friday, December 16, 2016
Video Semester Reflection
My Video Portfolio
This semester in video production I learned a lot. I gained a lot of experience in shooting film, writing narratives, editing film, creating voiceovers, and coming up with concepts for my videos. This semester I made feature, sports, and news stories. I learned how to use Premiere Pro to edit clips and make videos. I collaborated with my fellow students on multiple videos and communicated my ideas and strengths. My technical skills have slowly grown with time.
My First Feature Story
My first feature story was about two sophomore football players named Ryan Wallace and CJ Vredenburg. First I created a series of 21 questions looking to learn about their experience on the team. Next I shot lots of B-roll of Ryan and CJ playing in their game. I got many different shots and tried to follow the rule of thirds as well as the 180 degree rule. Then I interviewed the players and asked them the questions. Finally, after I had all of my footage, I edited all the clips and arranged them with my voiceover. The project took about a week from start to finish. Some challenges I faced were trying to find a game time that I could be at that would also allow me to meet my deadline. Also because the game was outside, the wind effected my NAT noise of my B-roll. I learned that you should give yourself as much time as possible to record and edit your clips. You shouldn't count on being able to shoot at any given time because sometimes things happen and you have to be flexible. I also learned that if you do not ask the right questions then you're interview answers may not come out as you hope. Some feedback I was given was that there was a good mix of shots of B-roll but that I had some jump cuts that I fixed in the reedit. I think the video turned out quite well and I really enjoyed producing it.
ONW Basketball Feature Story
The goal for this project was to do another feature story about anything we wanted. I chose to do some ONW sophomores named Adam Davis and Brennan Voss who were basketball hopefuls for the upcoming season. The video took about 4 days to shoot and edit. I began by coming u with questions about their personal basketball experiences both in and outside of school. Then I interviewed the subjects and recorded B-roll of them shooting and playing. I moved the camera often to get many different angles but still followed the 180 degree rule and the rule of thirds. Although the video was not originally intended to be so comedic, that is the way it turned out. My subjects were full of exciting and outlandish answers that made the final product interesting and unpredictable. Most of my feedback was positive and my fellow classmates approved of the comedic take on the video. I really enjoyed making the video and I look forward to doing more sports feature stories like it.My ONW Now Story
My final assignment of the semester was a story for my classes version of ONW Now. My partner and I chose to do a story on two ONW sophomore basketball players named Taylor Mahoney and Nick Johnson. After creating questions we interviewed the subjects. Next we attended one of the team's games and record B-roll. I think this B-roll was probably some of the best that I have ever recorded. We got a lot of different types of shots and the players doing everything they do on the court. Although our interviewees failed to go in depth about their experiences, we still produced a good video with the correct principles of a good feature story. The game was very exciting and I think that's captured in the film.
Summary
I think I enjoyed making first basketball feature story the most. The comedy made it really enjoyable on all ends of the spectrum. I'm not sure I would change is more time for the production of the ONW Now segment. I felt some what rushed and like I was running out of time. I learned how to make a good feature story and how to edit clips in Premiere Pro. I would like to make my videos more lengthy in the future. I look forward to doing more projects like the ones above.
Animation Semester Reflection
My Animation Portfolio
This semester in animation I did many different projects. In this post I want showcase what I've learned through my best projects. I used programs like Autodesk Maya, After Effects, and Photoshop by Adobe Suite.The Pen
 |
The Juice Glass
My Juice glass was one of my favorite projects. We used the revolve tool for this project to make the glass symmetrical. First we created half of the glass shape using the curve tool then used the revolve tool. The revolve tool made the rest of the shape for me. The glass turned out very well. I textured it with a very light blue blind to make it shiny and realistic. I also outlined the inside of the glass with the curve tool to make the juice inside of the glass. I texture this with a red ocean shader texture to make it look very real.
 The Hammer
My Hammer was another one of my favorite projects. I used the Vertex mode quite often for this project. I pulled the vertices in for the handle and for the hammer head. I used the bevel tool to shape the claw of the hammer and also the extrude tool to pull the claw out. The extrude tool also created the indention on the top of the hammer for the handle and the actual hammer head. I also made a nail using a cone, cylinder, and sphere. For textures I used phong textures to give it that nice shine. I also used some seamless file textures.
 Worm Video
My wom video was one of my first real animations in After Effects. I first created the worm itself in Photoshop. I then imported the worm into After Effects. I used the puppet pin tool to make the worm move in and out. I used ease in and ease out techniques as well. Then I used a null to move the worm across the screen. I learned how to use the puppet pin tool and the null tool in After Effects with this project. My first time using the null was a little rough. I made the grassy background using a printing tool in Photoshop.
Ice Cream Animation
This ice cream project was another one of my favorites. I really enjoyed the project because there was no tutorial so we had to figure out how to do it ourselves with only a few hints. I used the booleans difference and union tool a lot on this project. I used vertex mode to just the vertices of the ice cream scoops to make it look more realistic.The ice cream scooper was made using a cylinder and a sphere that i boolean-differenced to hollow it's center out to make it look like a scoop. The ice cream holder was made using some cylinders and spheres. The bowl was a cylinder that I hollowed out by putting another cylinder in and boolean differenced it. The textures were phong for the shiny metal loo and lambert seamless file textures for the chocolate and strawberry ice cream, as well as the vanilla.
|
Tuesday, December 6, 2016
Animation Personal Project
In my animation class we were assigned a personal project. The project was suppose to be a short animation about whatever we wanted it to be about. After a long time of thinking I came up with the idea of a cob of corn who accidentally gets popped when he gets to close to a a fire. The cob then became a lonely, sad, and kernel-less piece of corn. As he mopes round the corn field he finally finds some companions who have gone through the same thing he has. Although there was more intended for the story, this is were it ends.


The creation of the project began with sketches and doodles like these.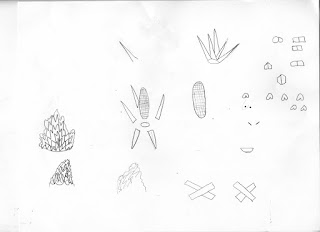

Once the doodles were completed I scanned them in and opened them in photoshop. I then pieced all the parts of the corn together. Next I added color to the back and white drawings. I imported a carton image of popcorn that I found on google into Photoshop.

After the character was completed I needed a background. I looked on google once again and found a picture of a farm with a silo and a lot of corn stalks.

When I was finished with all of my work in Photoshop, I imported all of my work into Premiere Pro. I began using skills I learned in my animation class to create this final animation.
I would say for future similar projects I need to set more reasonable goals for myself in terms of what my video should be when it is completely finished. The way I wanted the video to be would have required a large amount of added time that I was not able to give. I would keep the creative mindset when creating my next big animation. I enjoyed this project although I was slightly disappointed with the way it turned out. I look forward to doing more projects like it.
Subscribe to:
Comments (Atom)